Arts and crafts are a wonderful way to express creativity, whether you’re a seasoned DIY enthusiast, a parent managing playtime chaos, or someone looking to organise their growing supplies. However, keeping your crafting area tidy can feel like an endless challenge. Paint brushes, glitter, paper scraps, and fabric pieces can quickly take over your home if left unchecked.
This guide will help you create an organised storage system for your arts and crafts supplies, turning your home into a haven of creativity and order.
Why Does Craft Organisation Matter?
With an organised arts and crafts space, you’ll enjoy less clutter, quicker access to supplies, and a smoother crafting experience. Imagine reaching for your paintbrushes without digging through a drawer full of tangled ribbons or finding the perfect paper in seconds because it’s sorted by colour and pattern. Organisation also makes it easier to inspire creativity, especially for children, who thrive in tidy but stimulating environments.
Here’s your step-by-step guide to creating the ultimate arts and crafts storage system!

Start by Decluttering
The first step to organising anything is decluttering, and your craft supplies are no exception. Follow these tips to get started:
- Assess What You Have
Gather all your craft supplies in one space. Group similar items together—paints, brushes, papers, yarns, etc. This will help you see exactly what you own.
- Sort and Purge
Ask yourself: Do I really need this? If you haven’t used it in the last year, consider donating it to a local school or community centre. Keep only the essentials and those sentimental items you’ll actually use.
- Mind the Expiry Dates
Take note of items like paints, glues, or markers—these can dry out over time. Toss anything that no longer works.
Once you’ve decluttered, it’s time to decide how and where to organise your curated collection.
Choose the Right Storage Solutions
Invest in sturdy wall-mounted shelves or freestanding units to maximise your storage space. Clear plastic bins or labelled baskets can be used to organise smaller items. Adjustable shelving is ideal if your collection grows or changes often.
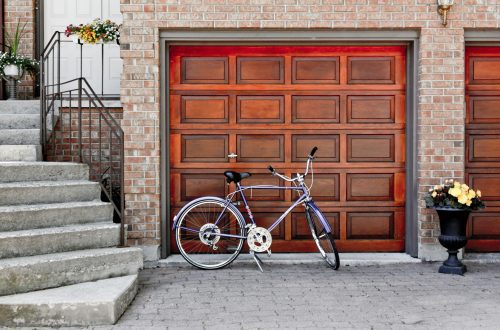
For those with a larger collection or bulkier items like fabric rolls, garage racking offers a robust and practical storage solution. It’s perfect for keeping everything within easy reach while maintaining order.
- Stackable Drawers
Stackable drawers are great for storing small supplies like beads, threads, and stamps. Opt for transparent ones so you can instantly see what’s inside.
- Pegboards for Tools
Pegboards are a game-changer for tools like scissors, rulers, and tape dispensers. Arrange them nicely on the board, so they’re visible and easy to grab.

Organise by Category
One of the simplest ways to create an efficient storage system is to organise by category. Group similar supplies together—paints in one container, papers in another, and so on.
Use labels for each bin or drawer to make it crystal clear where things belong. You can even colour-code your labels to make the system more visually appealing.
If you’re organising your children’s craft corner, consider using pictures on the labels so younger kids can easily find and return items to their rightful spots.
Make it Accessible for Everyone
Crafting should be fun, not a hunt for missing glue sticks! Ensure everything is easily accessible.
- For Kids
Store items like crayons, markers, and craft paper on lower shelves so children can reach them easily. Use open bins or baskets that are lightweight and simple to pull out.
- For Adults
If you’re an avid crafter, consider a trolley with wheels to store your essentials. It can easily move with you from room to room or be tucked away when not in use.
Add a Personal Touch
Personalising your craft space can make it more inviting and inspire creativity. Consider some of these ideas to make your organised area uniquely yours:
- Use pretty jars or repurposed containers to store smaller items like buttons or tape.
- Decorate the labels or baskets with craft paper or stickers to reflect your style.
- Display completed projects or inspirational art in the crafting space—it’ll motivate you to start your next masterpiece!
Maintain the System
Creating an organised system is only half the battle—it’s equally crucial to maintain it. Dedicate a few minutes after each crafting session to tidy up. Establish a habit of putting items back in their designated spots, and teach kids to do the same.
Periodically reassess your supplies. Are there tools or materials you no longer use? Do you need to replenish certain items? By staying on top of your inventory, you’ll save both time and money.
Transform Your Craft Chaos Today
An organised arts and crafts storage system is a game-changer for anyone who loves creating. From decluttering and choosing the right storage solutions to maintaining the system, these simple steps will set you up for crafting success.
Feeling overwhelmed about where to start? Don’t worry—once you’ve taken the first step, the rest falls into place like perfectly cut paper strips. Get the shelves up, the baskets labelled, and the racking filled, and enjoy a space that sparks creativity every time you visit it.
Happy crafting!


This guide is so helpful! I love how it breaks down the steps to organize arts and crafts supplies. Decluttering first is key. Can’t wait to create my own tidy and creative space.