

I am so happy to start crafting for Valentine’s Day. Not that I don’t fully embrace Winter, but its been colder than usual here in London and I was starting to get a tiny bit bored of the lack of colour. So welcome Valentine’s Day, warm hugs (which always makes me think of Olaf!) and the colour red.
Valentine’s Day is a great occasion for the whole family to celebrate. I treasure the Valentine’s Day cards my parents gave me as a child and carry on the tradition with my own children at this time of year.
I think that here in the UK we’re pretty subdued in terms of decorating our houses. But I’m here to show you that Valentine’s Day decor can be fun with my handmade Valentine mobile. This craft is for all the mums out there who want to make a personalised decoration featuring some much-loved photographs.
This is a sponsored post on behalf of Adobe Photoshop Elements 2018
I love crafting with my photos. Like many mums, I take a huge number of photographs of my children. And why not! They change right before my eyes and looking through my photos makes me very happy. It makes me even happier to use those photos in my crafts – which is why my handmade Valentine’s Day mobile is perfect!
Material to make a family photo Valentine decor:
A selection of favourite family photographs, landscape works best
Photoshop Elements 2018
Ink jet photo printer and photo paper
Cutting mat and craft knife
Branch or long stick to hang photos
Bakers twine
If you haven’t yet got a copy of Adobe Photoshop Elements 2018 then don’t worry as you can get a free trial of the software for 30 days. It’s such a great way to get more from your photos.
How to make family photo Valentine decor
The first step was to select which photographs I wanted to use. I chose about 8, making sure where possible each image was a landscape with plenty of space around the faces which is the area I wanted to focus on.

I edited my chosen photographs in Photoshop Elements 2018 using Guided Edit – Fun Edit – Shape Overlay Effect. This Guided Edit allowed me to edit each photograph and select an area of each one to highlight – the faces.
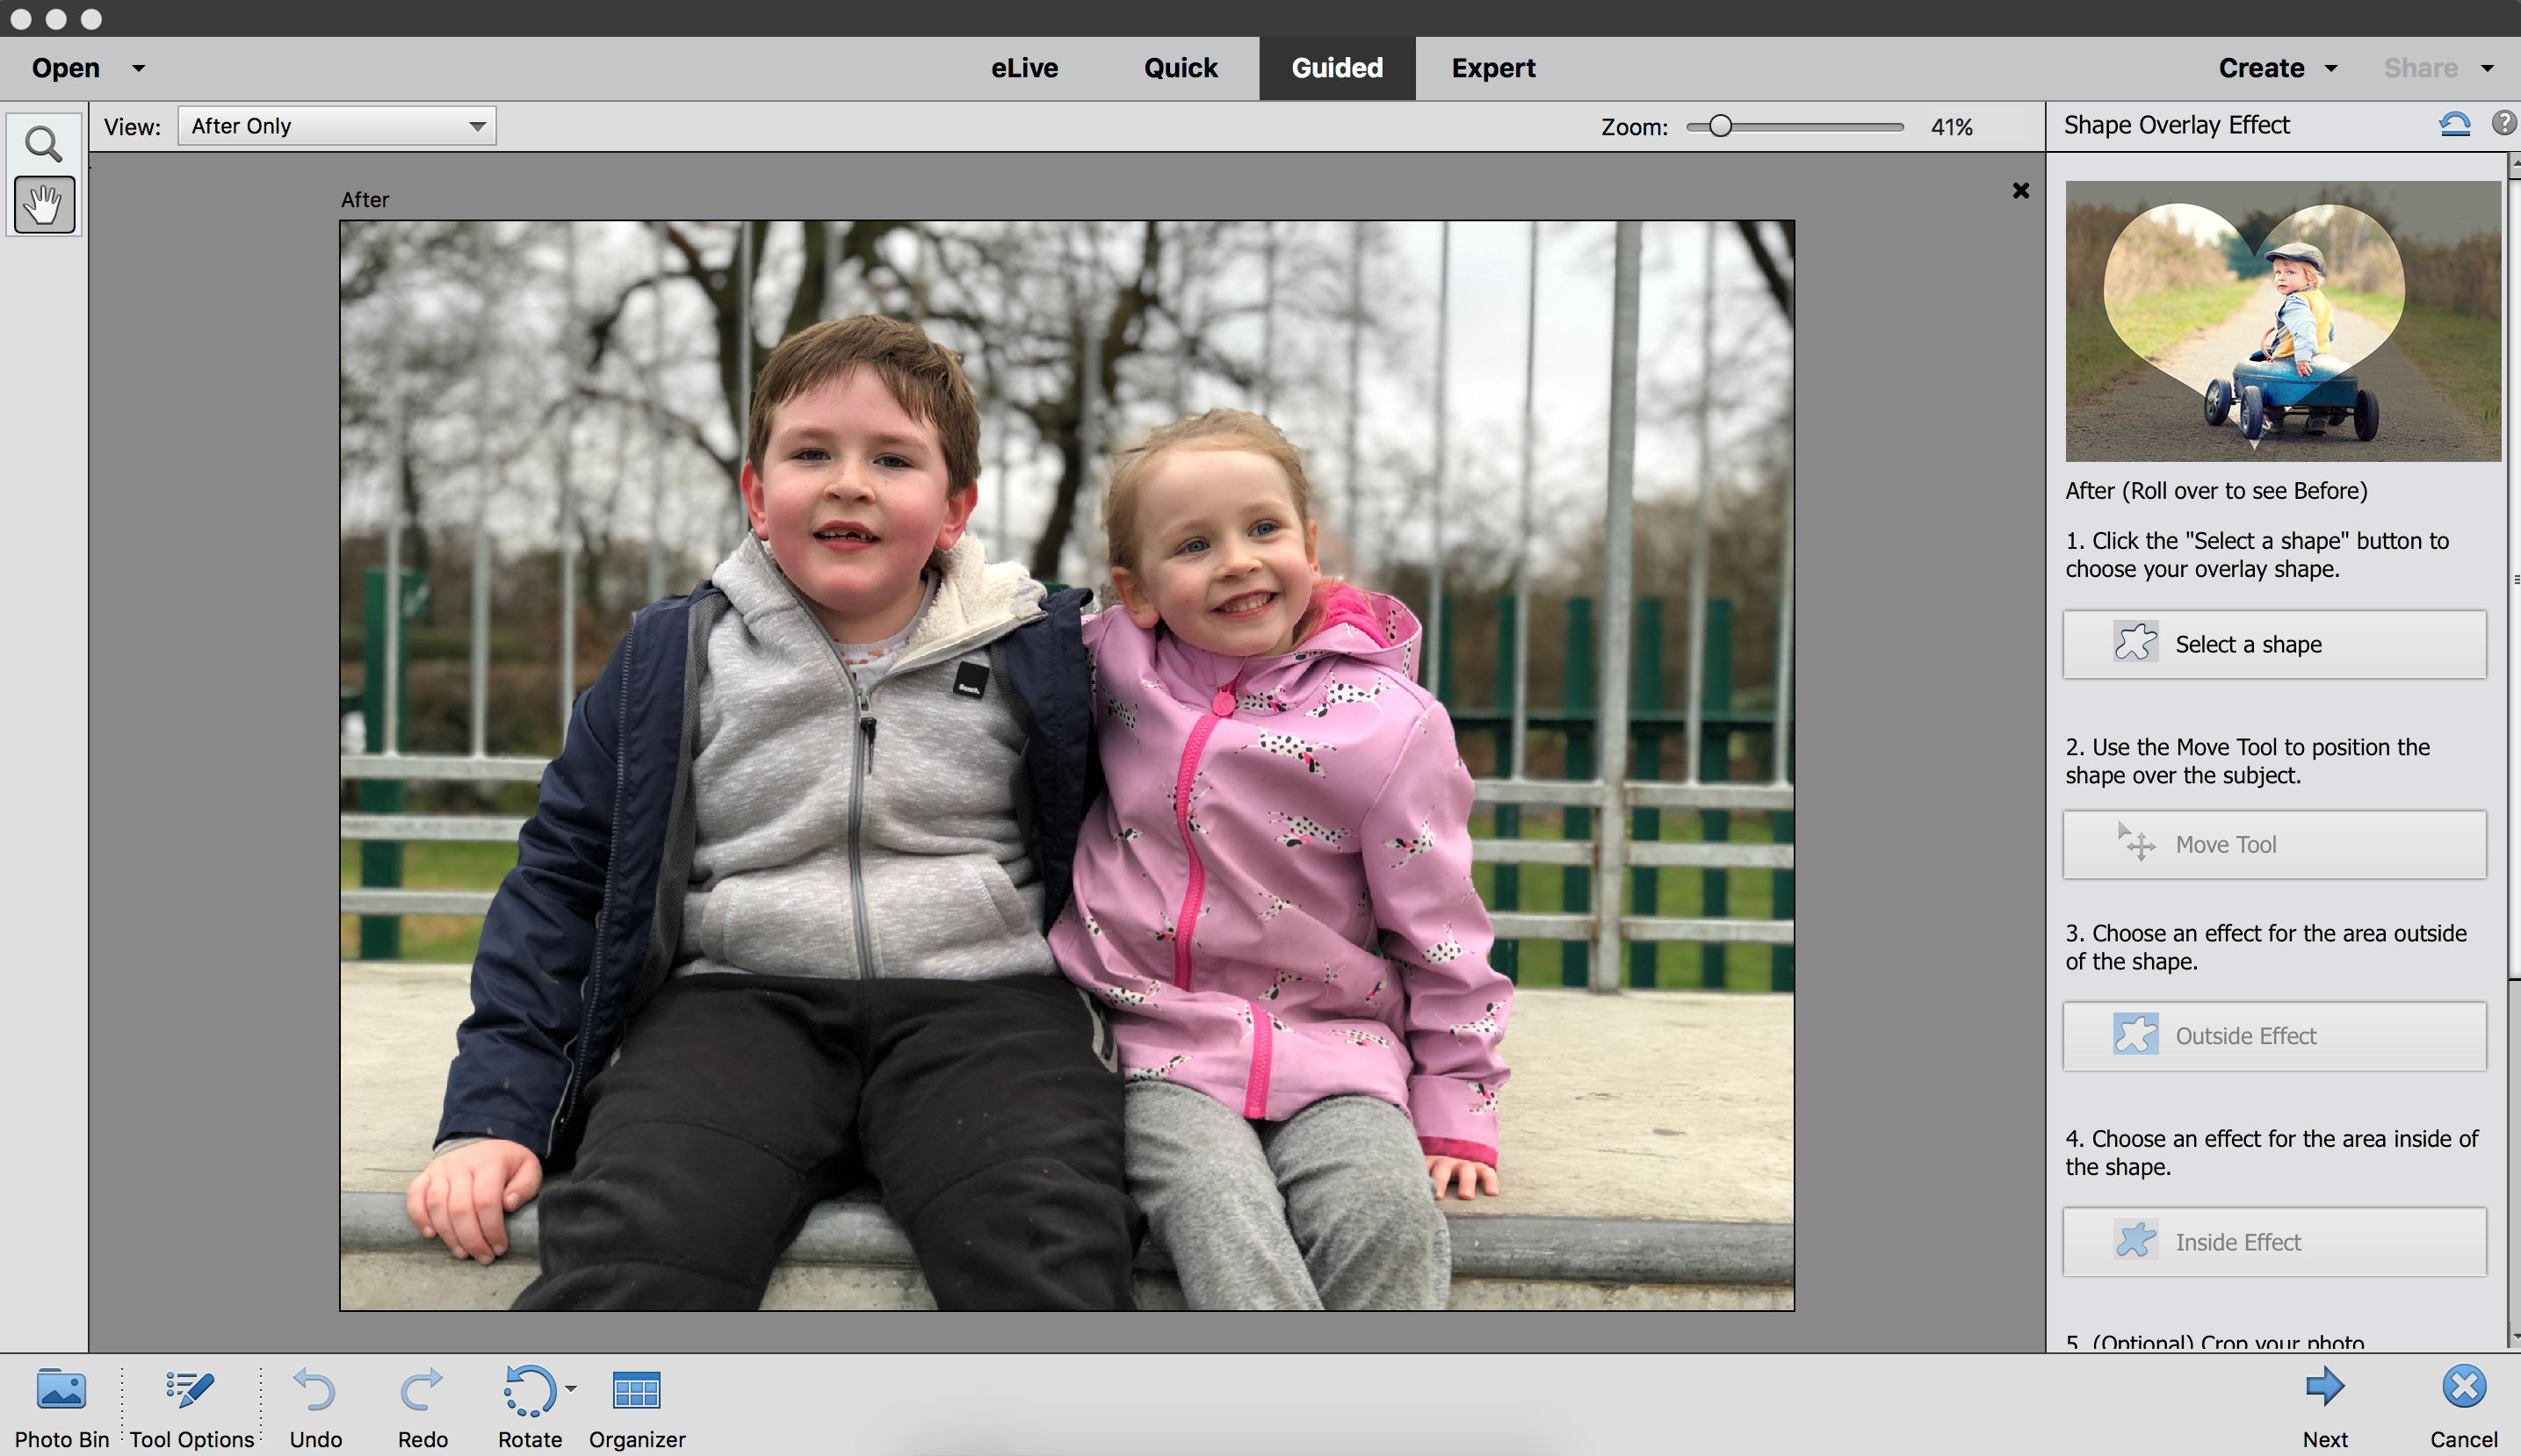
Open your chosen image in Shape Overlay Effect. First select a shape. I chose the middle one of the three heart shapes as this is a Valentine’s Day project but there are several other shapes you can select, from stars to squares, circles and more. Use the Move Tool to position over the faces, and re-size by clicking on the corner of the box and pull to the size required as necessary. Click ok.

Scroll down to Outside Effect. I really like the Canvas effect and change the intensity to about 80. This helps contrast the photograph with the part you want to focus on.

Scroll down to Inside Effect. I chose the Spring effect and set the Intensity to 100 but there are lots of options to choose from. I just chose the one that suited my project best.
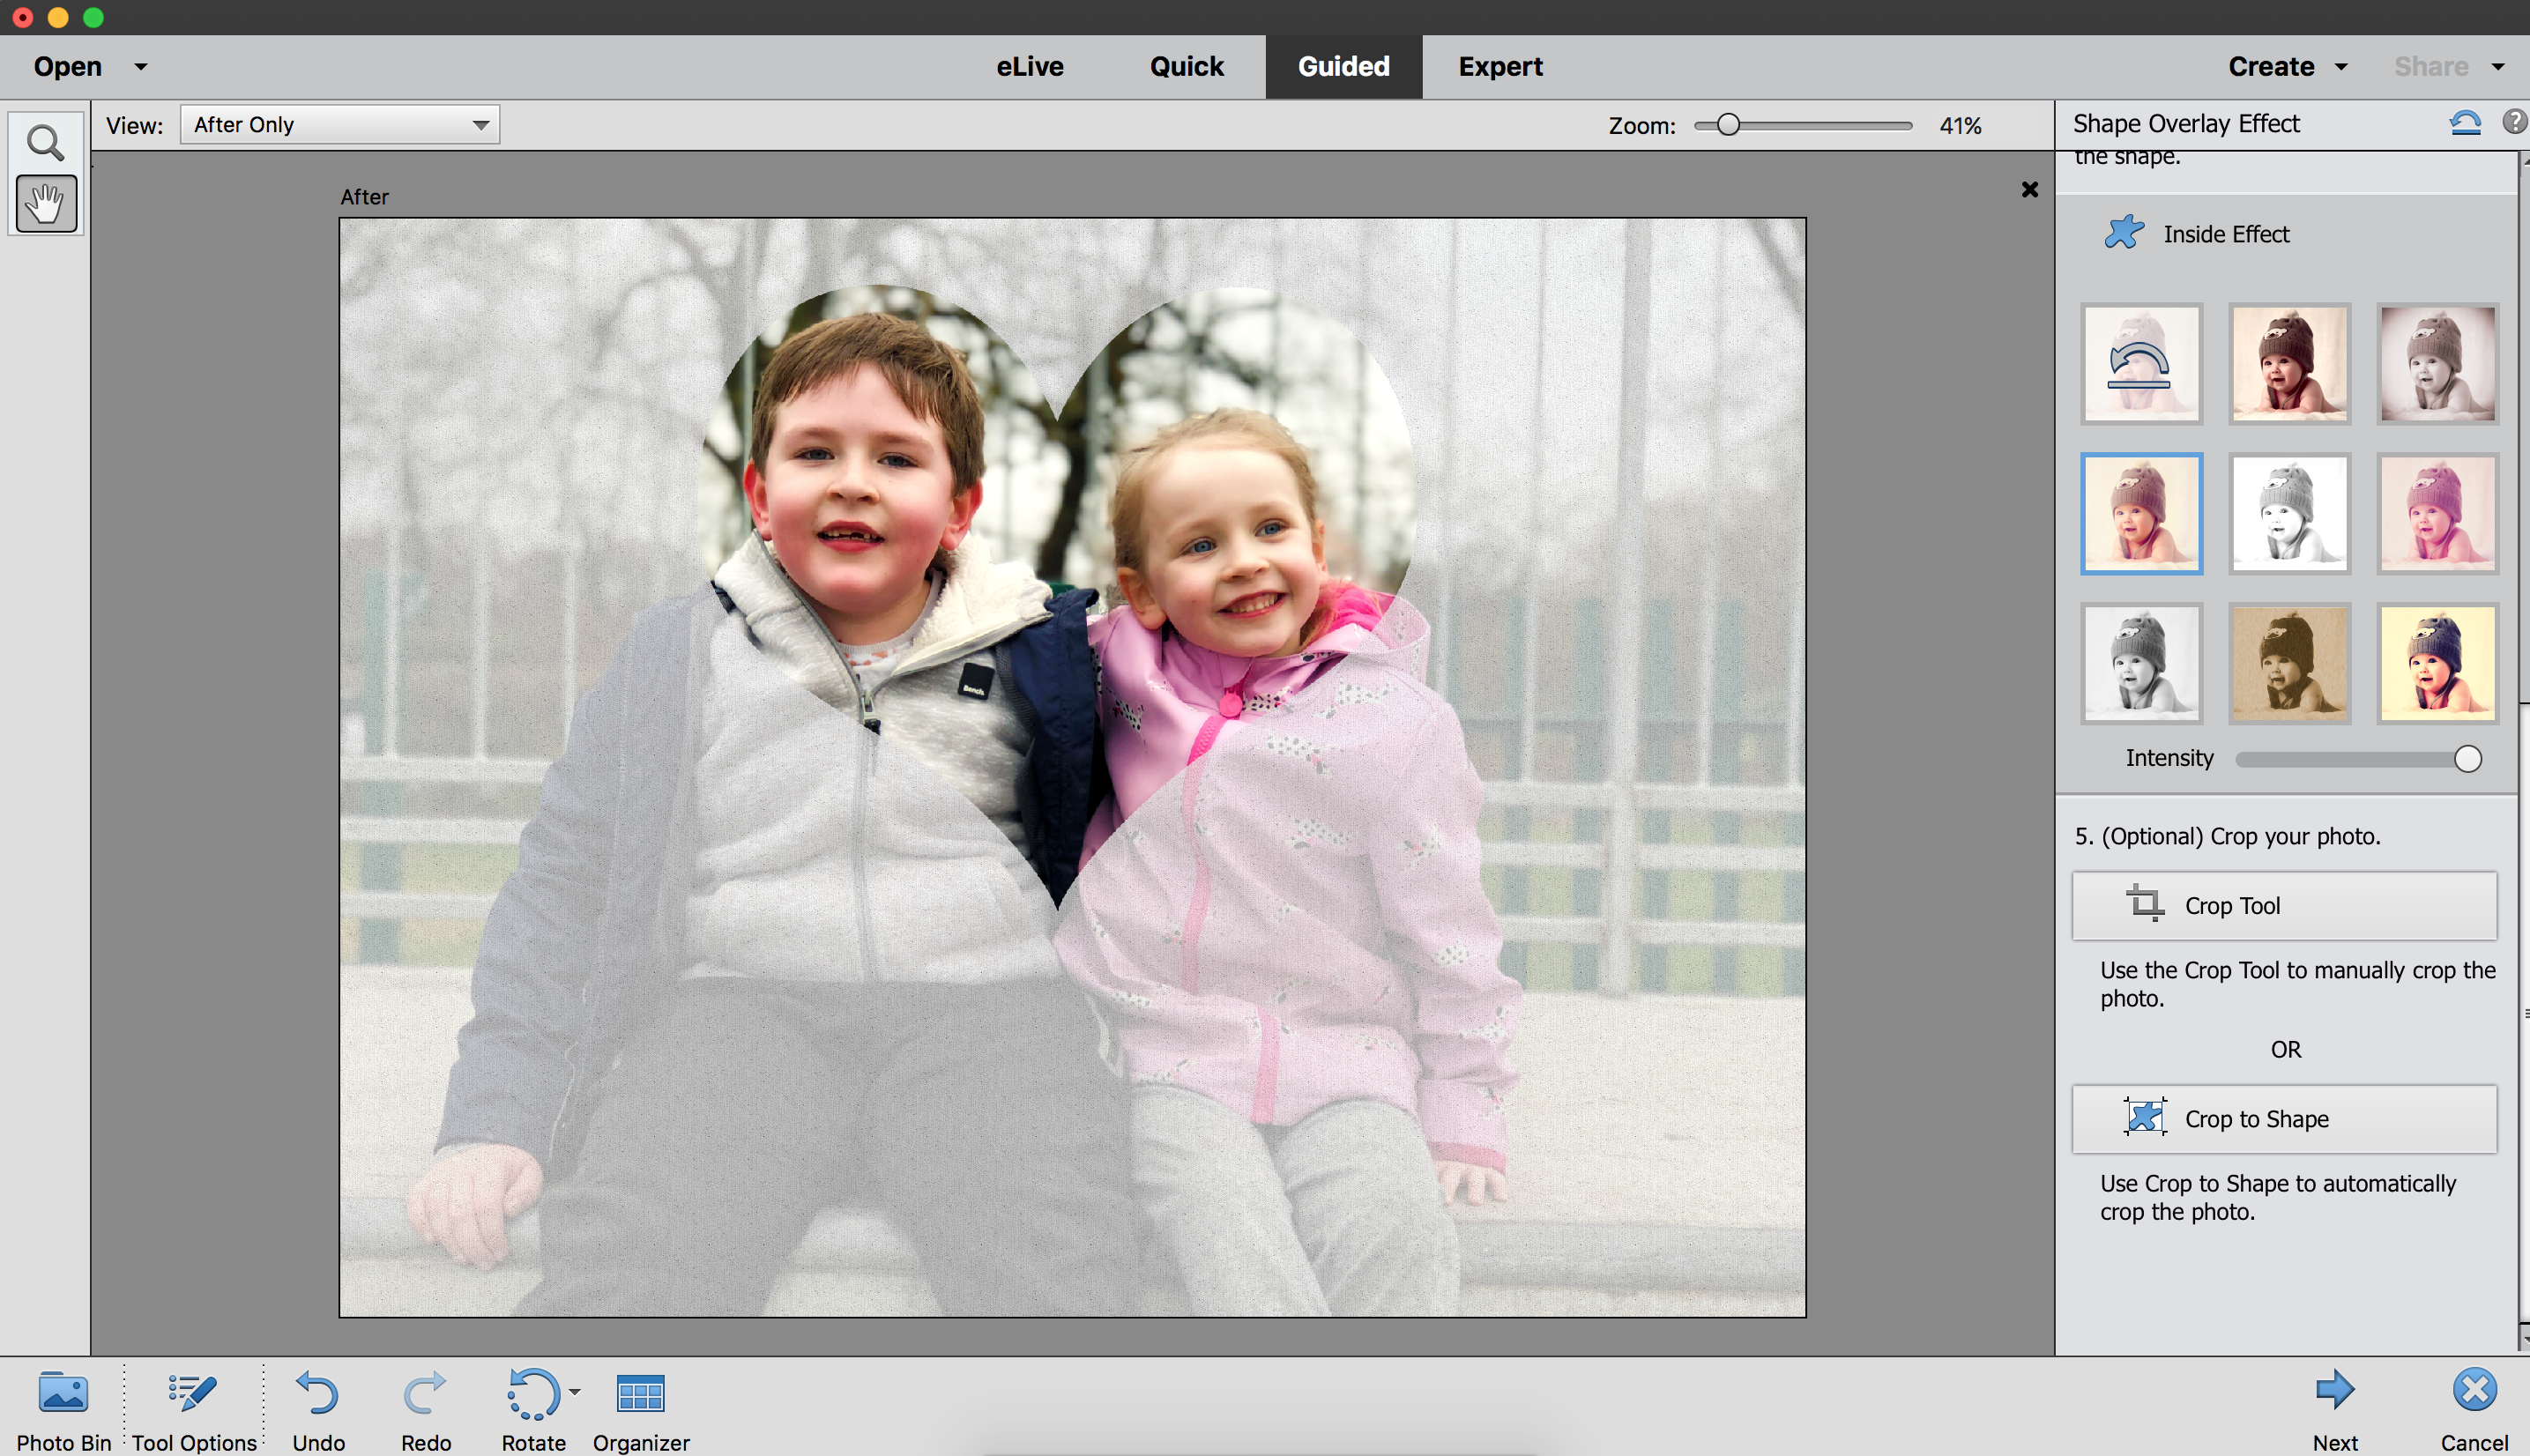
At this stage, you can crop your photo using the Crop Tool or Crop to Shape option. I used the Crop Tool to re-size my finished photo by clicking and pulling the edge of the box to my desired shape. There is also the option to Crop to Shape, which I chose not to use, as this would have cropped my image to the size of the heart and I wanted to keep my images quite large so I could print them out and craft with them.

Click next and save your image. I chose to save all mine as .png so I could use them on my blog later.

Here is the final image.

You can see a short video of the steps I went through here:
When I was happy with my edited photos, it was time to print them. I opened Create – Photo Prints and Contact Sheet. The default contact sheet was 4 images on a page which was perfect. I chose Local printer, selected Actual Size, and printed them on our Ink Jet photo printer on photo paper.

To turn my edited photographs into my Valentine mobile, I cut around each photograph using my compass cutter and self-healing cutting mat as I wanted them to be a circle and not the standard rectangle that they printed as. I then used double-sided tape to stick each image onto red card and cut round each one with pinking shears.

To finish off my Valentine décor, I punched a hole at the top of each photograph and threaded varying lengths of twine through each one so I could see them all when hung up.

I hung my favourites from a branch I painted with red chalk paint and then placed it on the wall in our living room. I really enjoyed using some of my favourite family photos to make some fun Valentine decor using Photoshop Elements 2018. Let me know if you try it yourself.
Pin for later:


This a such a great idea and super unique! Adobe is such a great tool, I’ve never really known how to use it properly, but this has helped! Thank you Jenny!
How clever and creative are you – this is a fab idea and looks really good x
Aww this is so sweet! Lovely idea for Valentines Day decor too! I really need to get photoshop I think xx
What a great idea! So effective and I would love this in my house all year long (but a fab idea for valentines day too!). xx
These are so pretty I love the fact that you were abl3 to choose the photos and personalise them into a gift.I am a big fan of photoshop
These are so pretty I love the fact that you were able to choose the photos and personalise them into a gift.I am a big fan of photoshop to edit my photos.
Very cute, I have PSE 2015 at the moment. Might have to upgrade!
This is such a great idea! I have so many photos stored on my computer but not that many printed out. This would also make such a lovely gift
This is such a great idea! I used to love using photoshop to edit my photos but haven’t used it in a while. Will have to try this out and see if I can make a new photo wall.
Well this is just adorable! I love it! What a sweet way to decorate for Valentine’s day! H x