
I love the Halloween season and it’s such a fun time to craft with kids! I love how we have started to craft round the table after school again. Today I wanted to share how to make an origami Witch’s Hat. My son loves origami and these are a really fun Halloween craft activity for kids.
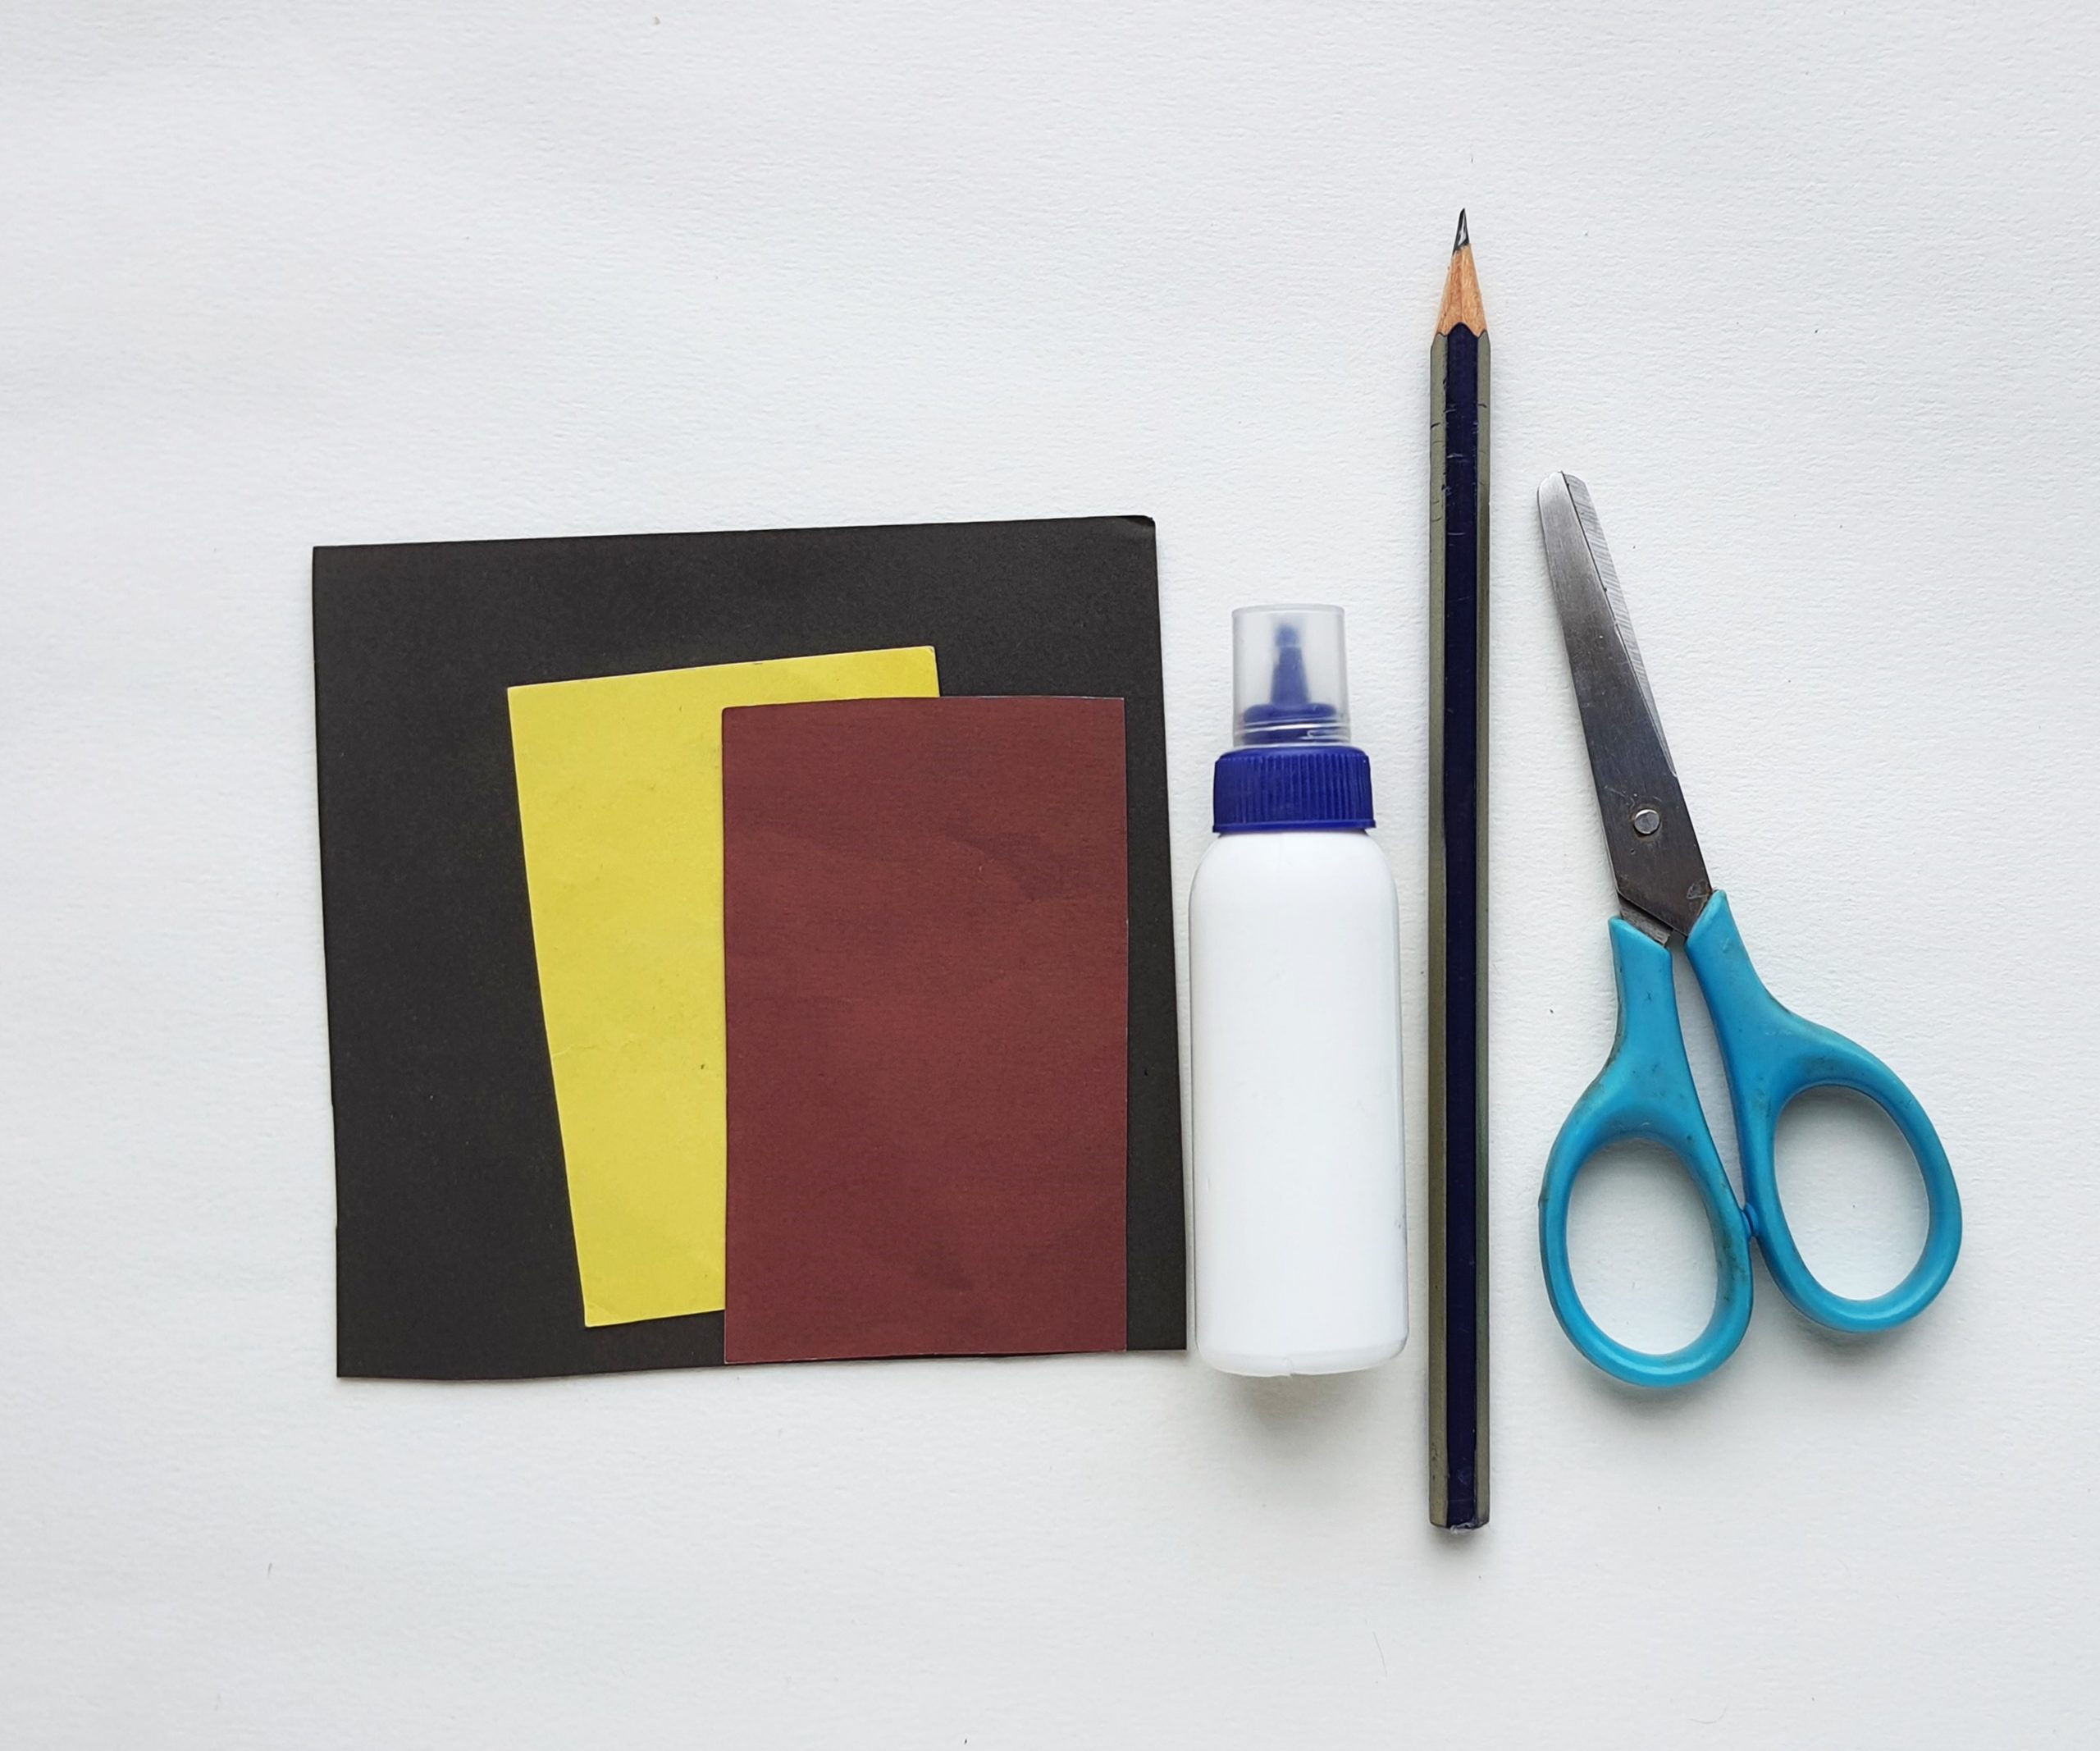
You will need:
Coloured craft paper in black, yellow and brown
Scissors
Craft glue
How to make an origami Witch’s Hat
Select a square paper for the origami hat; we’re using a 10 inches x 10 inches paper.

Fold the square paper into half diagonally.

Hold the right side of the current paper and fold it into 1/3 inwards.

Hold the left side and fold it inside, aligning its outer edge with the opposite side.

Fold up the bottom side, slightly above the bottom edge of the other side of the current pattern.

Unfold the last fold.

Hold the bottom corner on the right side. Fold it upwards and align the diagonal edge with the crease created in the previous step.

Hold the bottom side and fold it up again, this time make fold along the fold created in step 5.
Similarly, fold the other side of the current pattern.

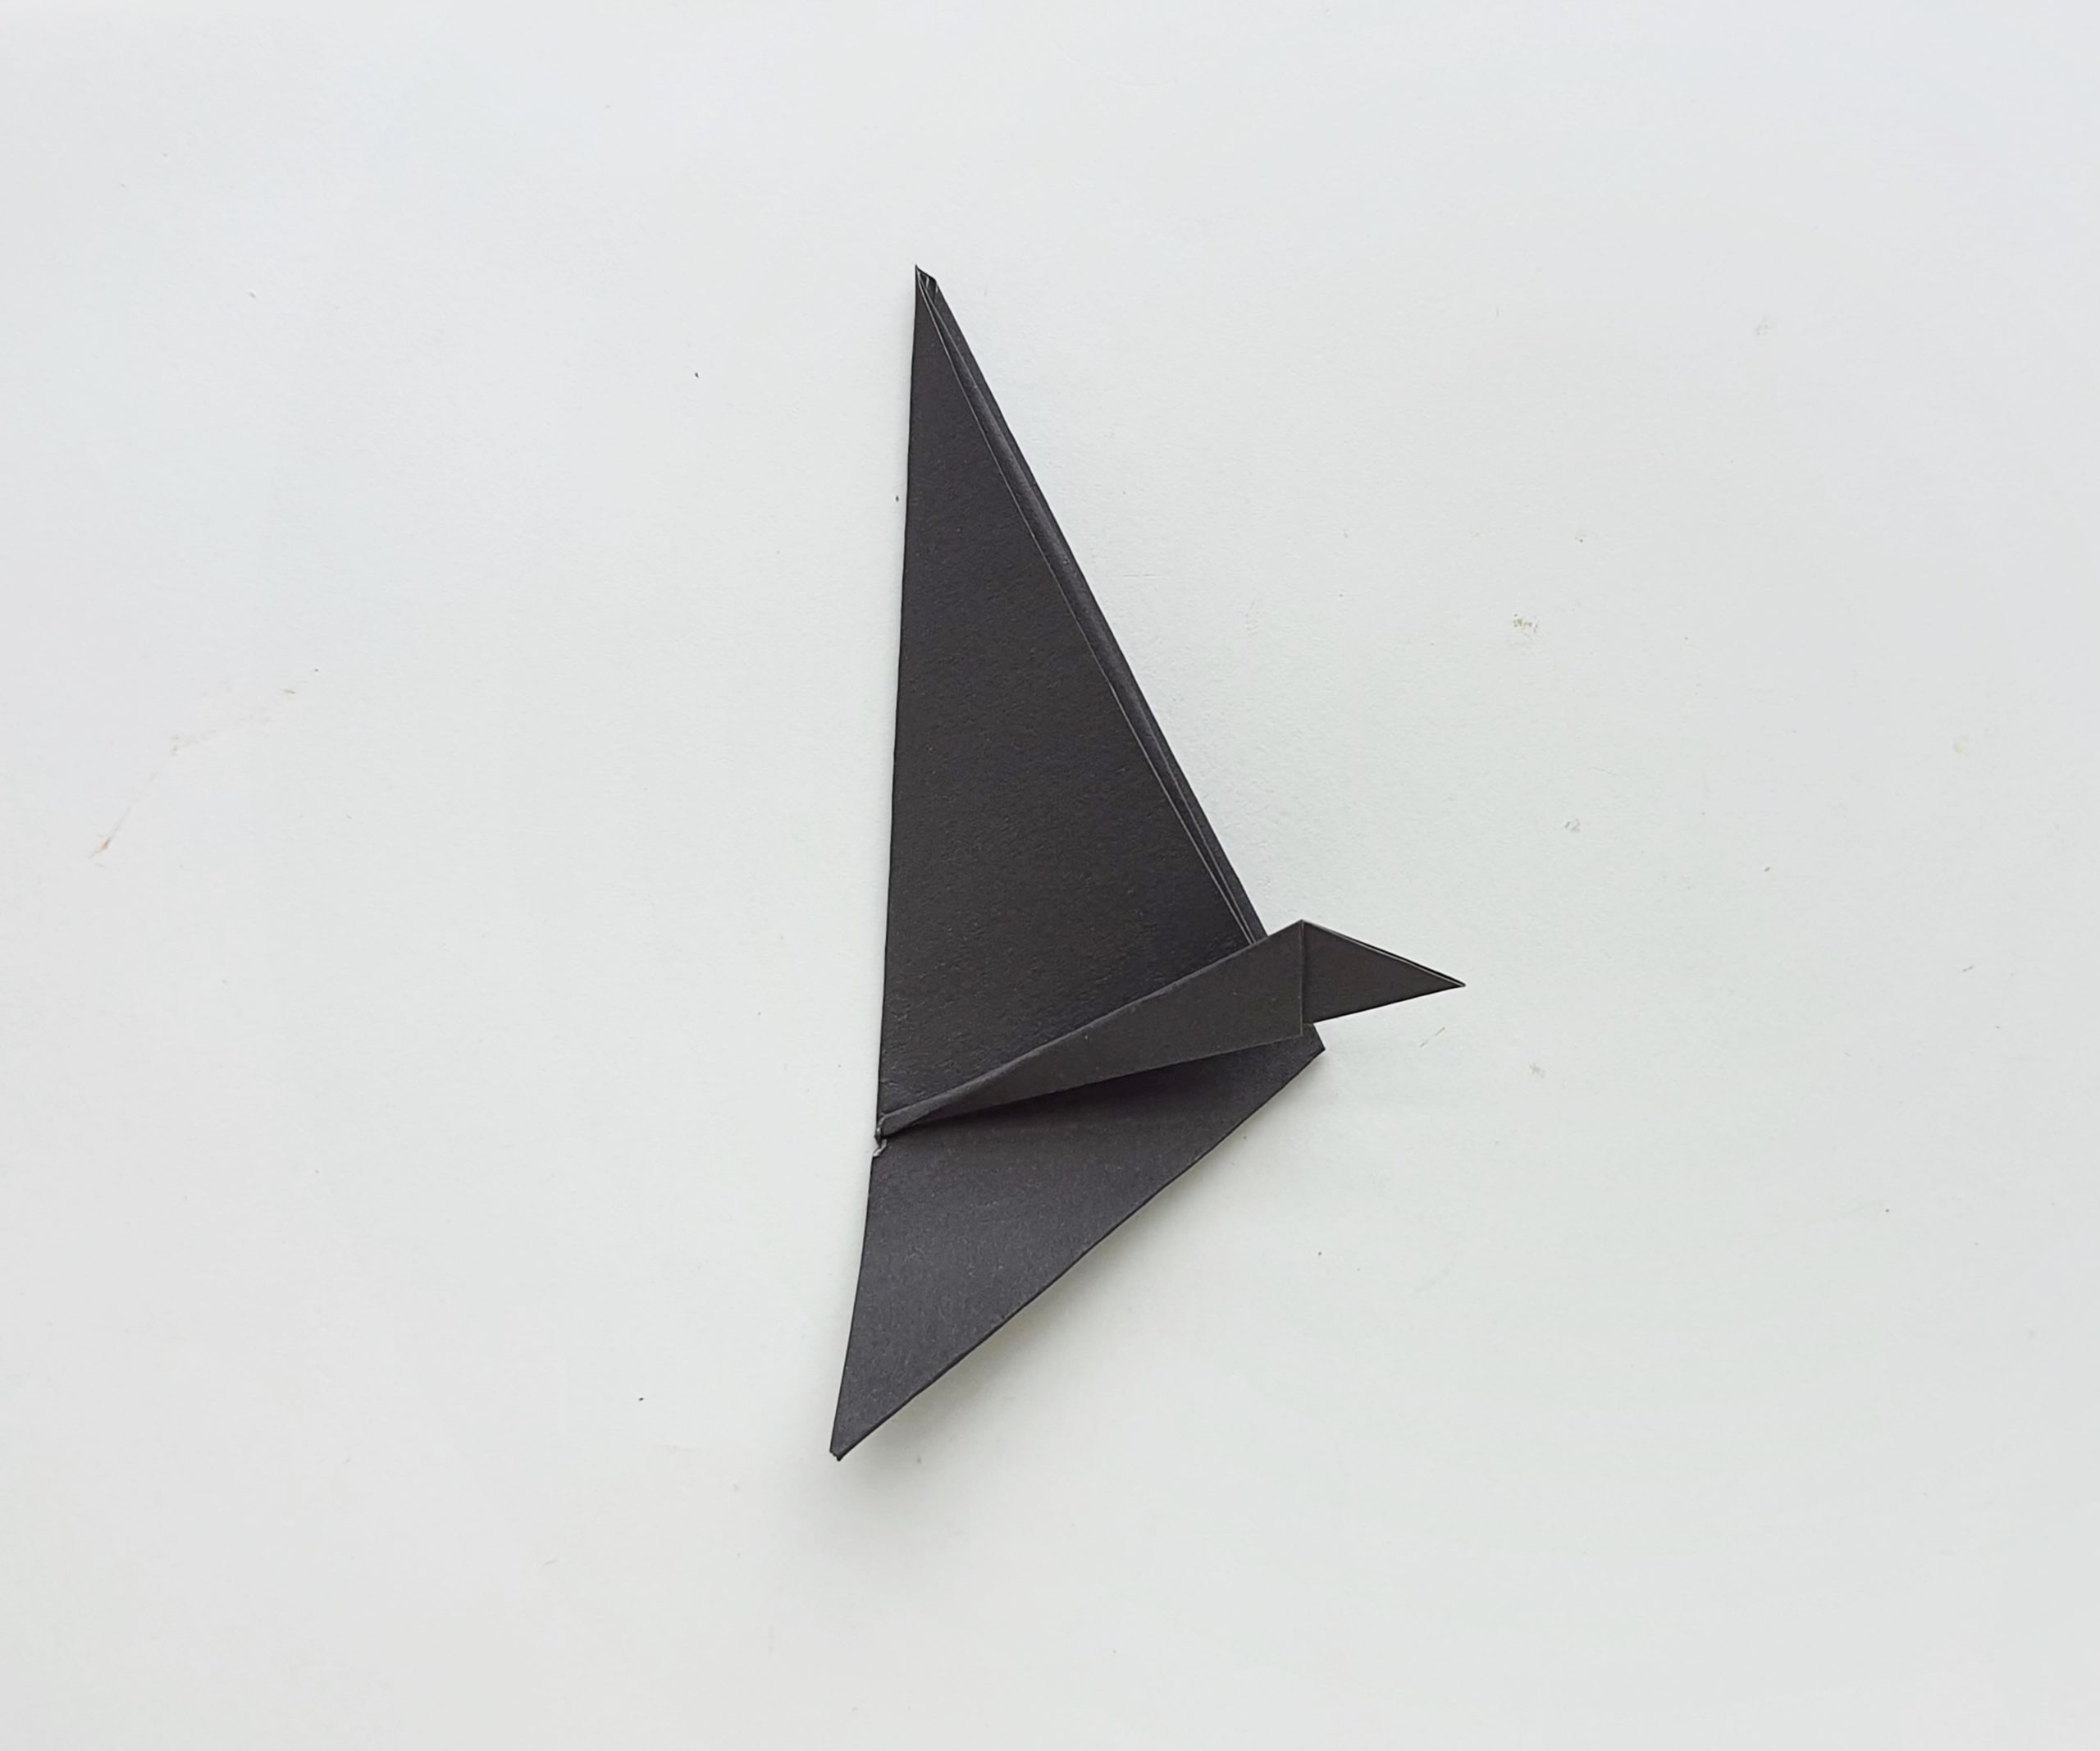
Now hold the current pattern and open the bottom side of the pattern carefully. Hold the folds created in the last step so they remain secured. This will give the origami flat hat a 3d look.

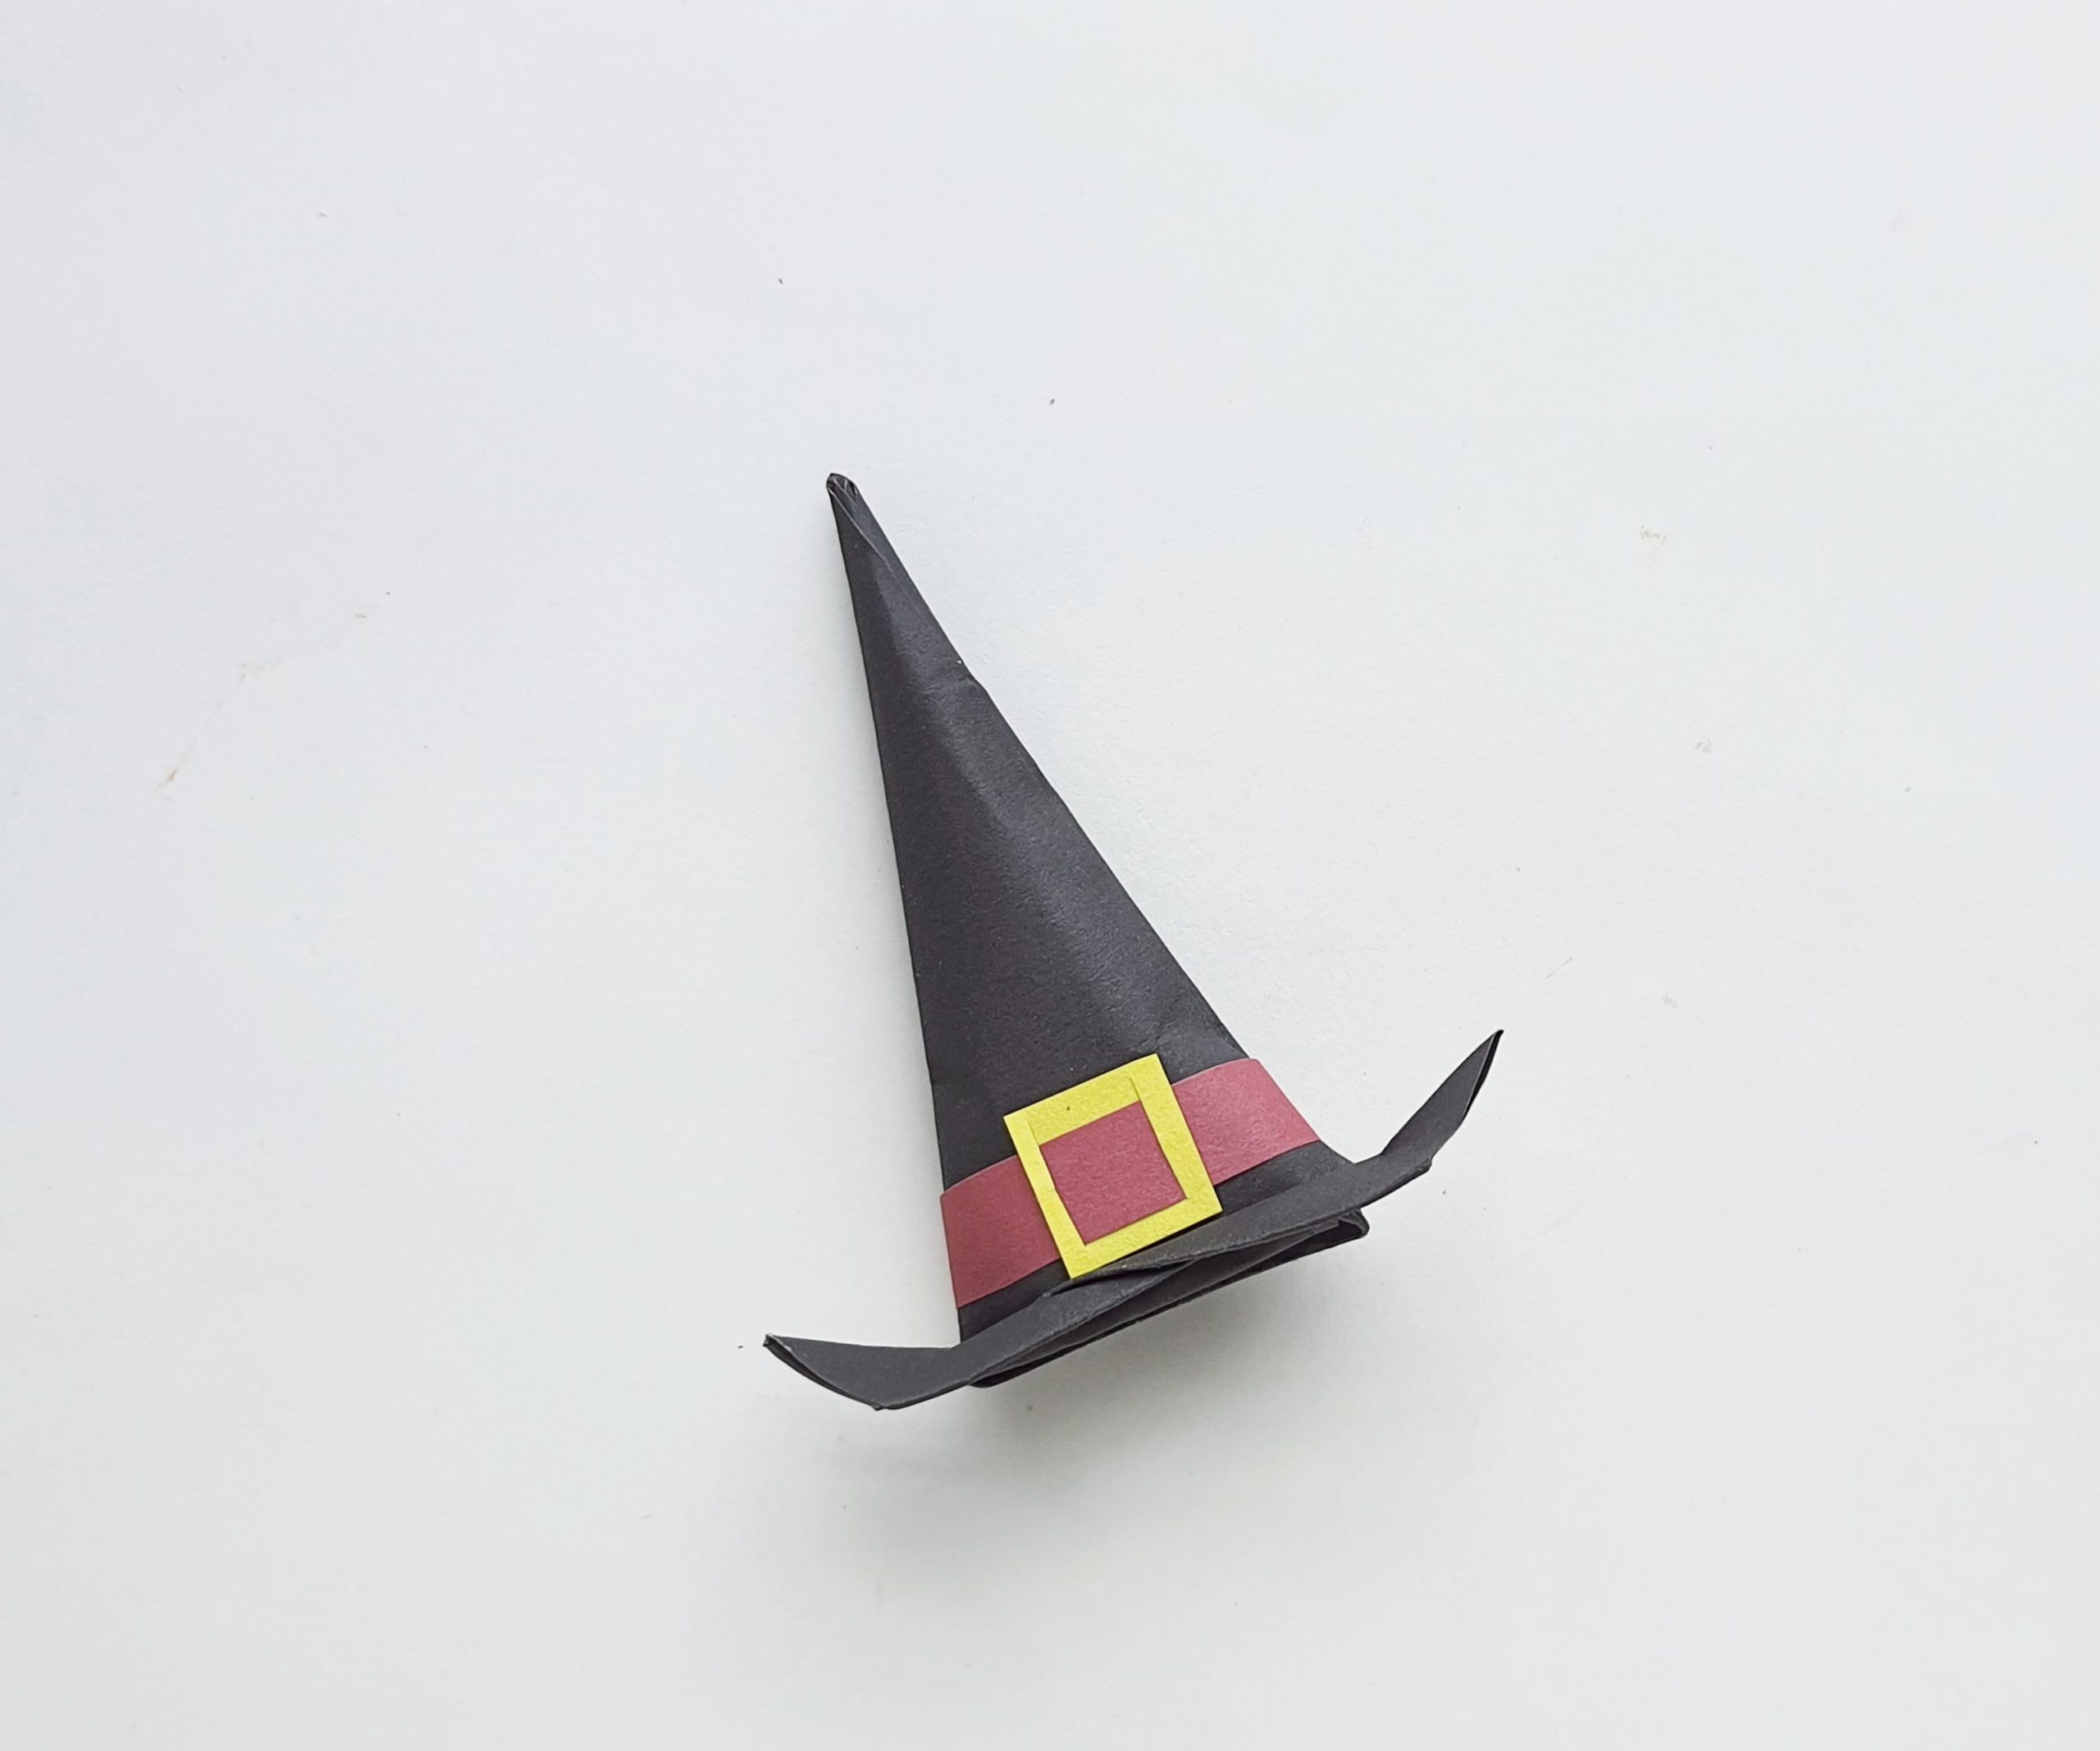
Cut a strip and a small square paper. Cut 2 slits along 2 opposite sides of the small square and insert the strip through the slits from the same side. This will be the hat strip.

Attach the hat strip around the bottom side of the hat cone.
Use finger tips to carefully curl the top pointy end of the origami hat.

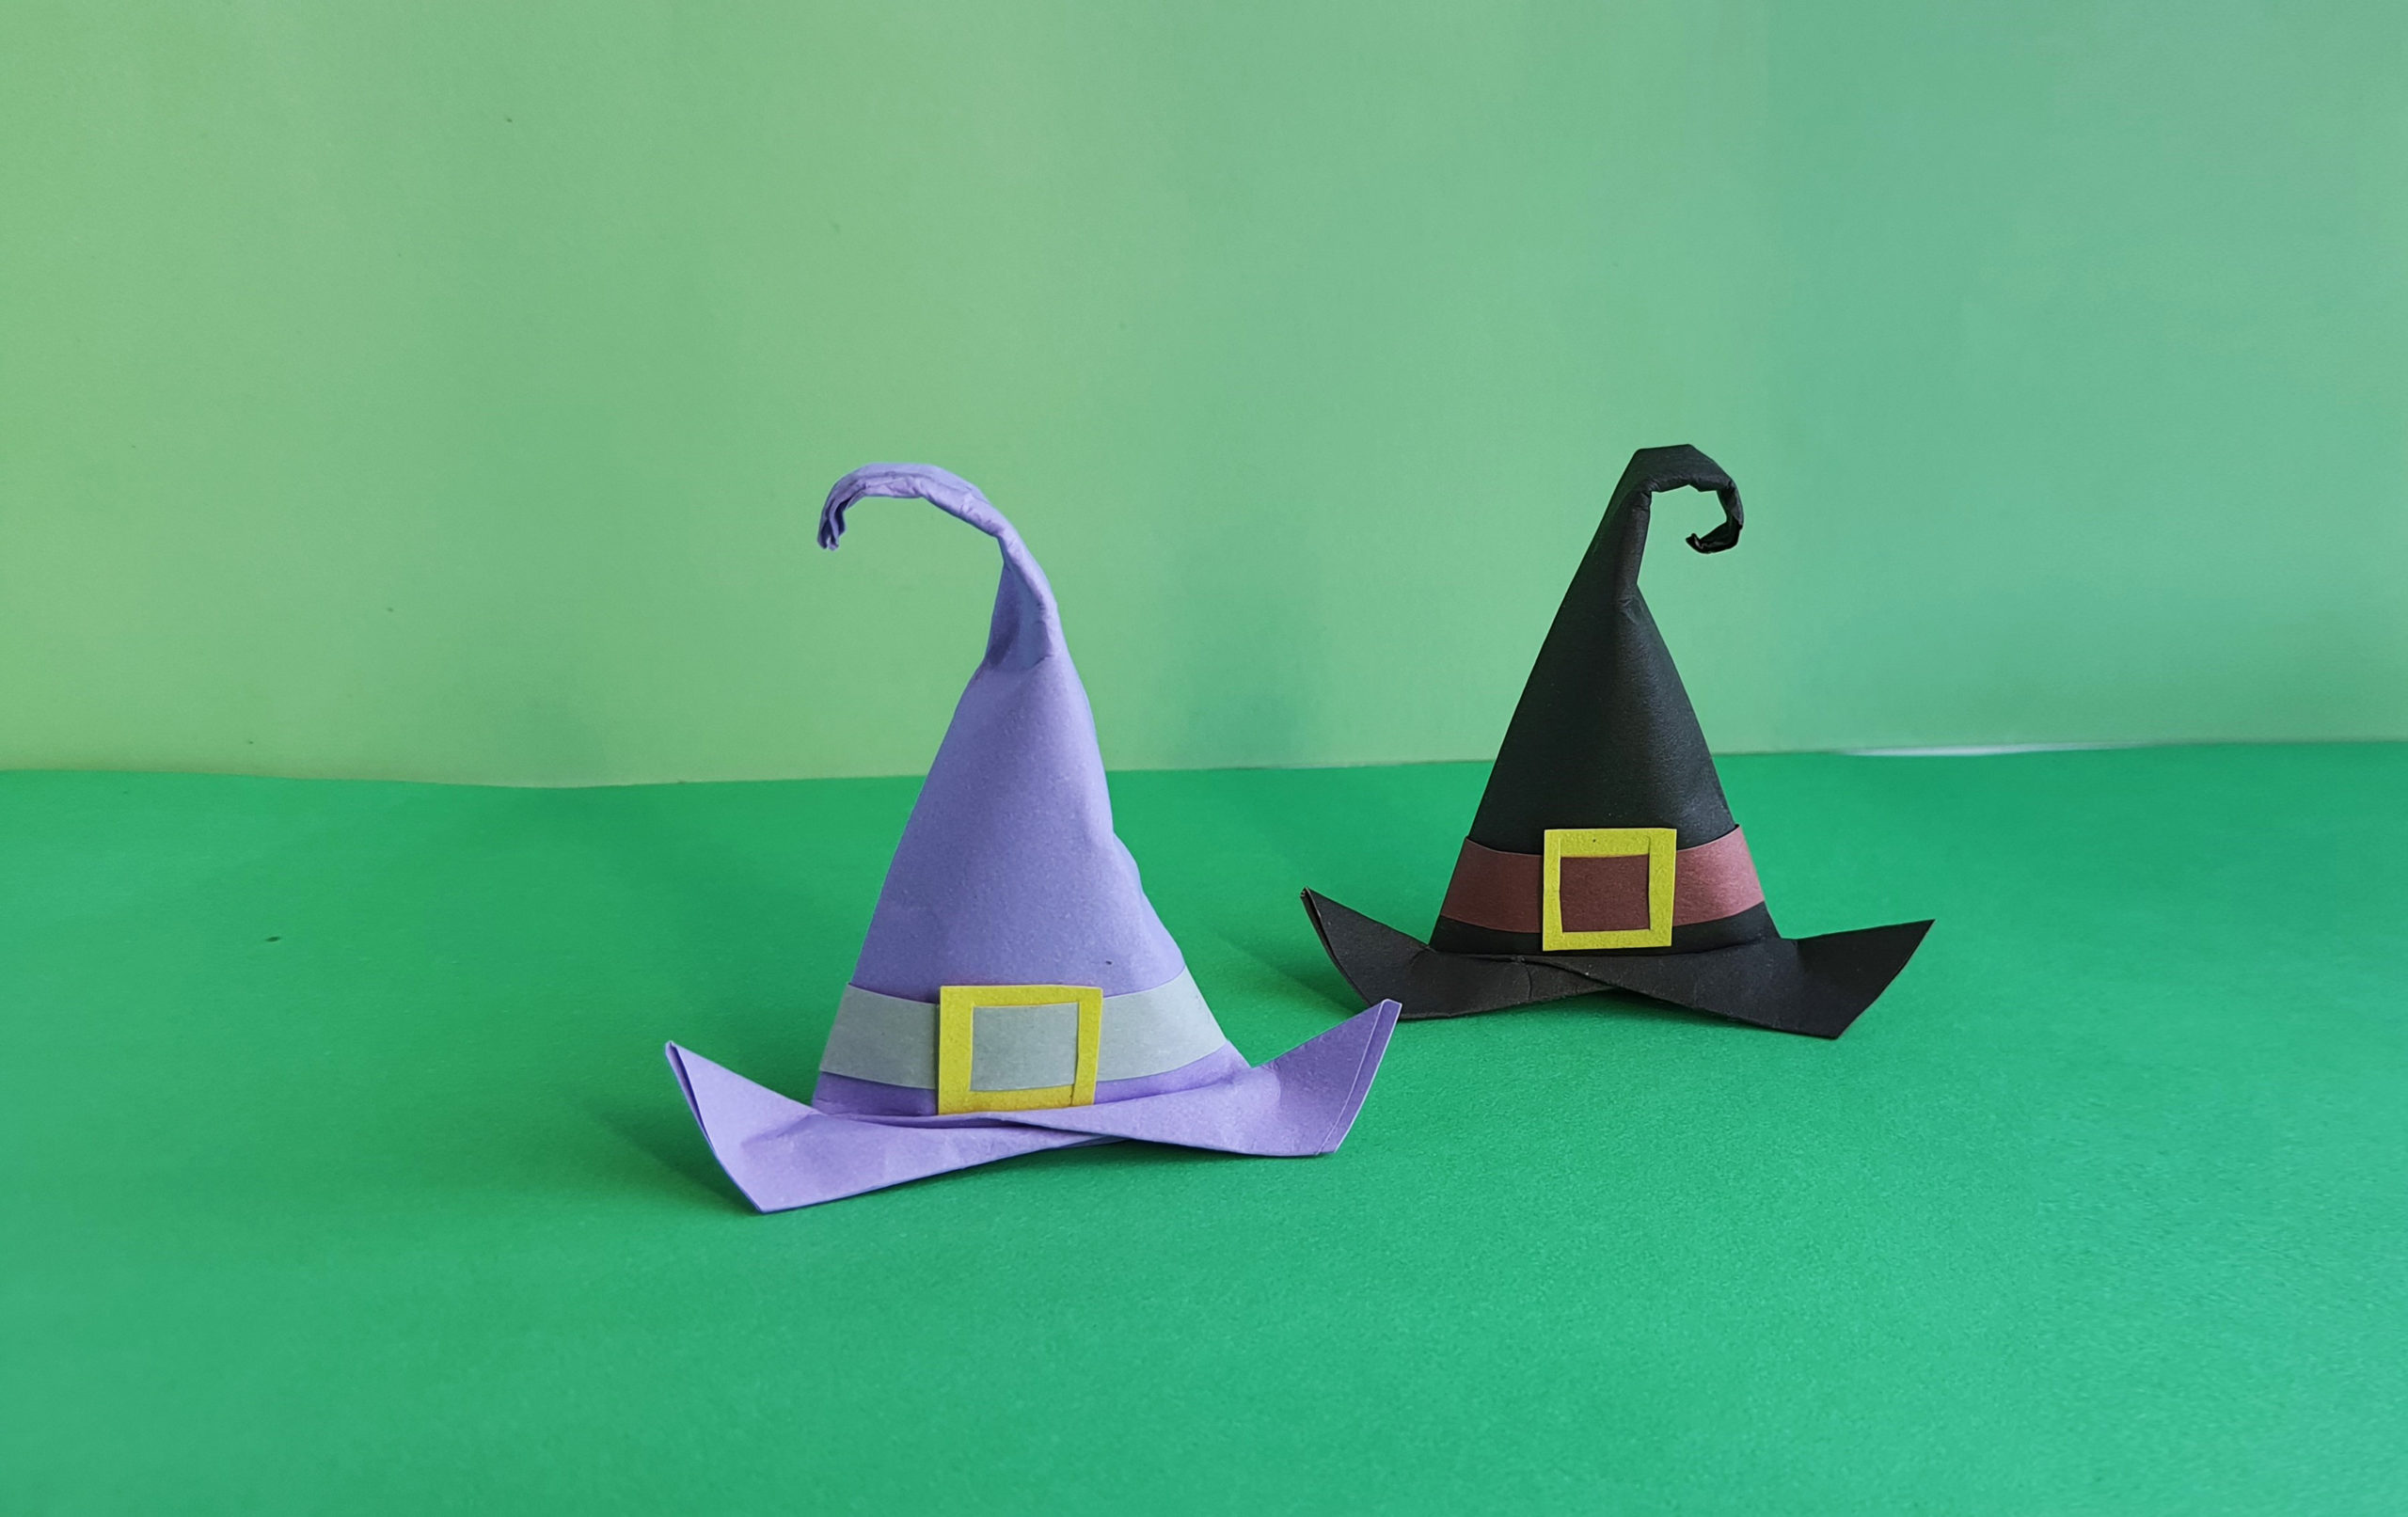
We loved making the origami witch’s hat in black, but you can make it in other colours too!
You may be interested in some of our other Halloween crafts for kids:


Jack is really into origami at the moment so I will definitely get him to give this a go! It looks so cool and perfect for Halloween!
Oh wow, they are great. They look so effective and once you know how they are pretty simple. Thanks, Mich x
best craft ever!