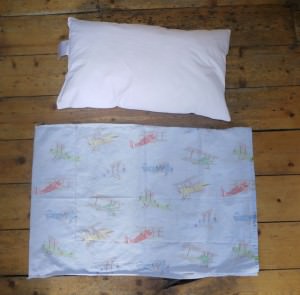
Edward’s bedtime routine is pj’s, bottle and climbing the stairs to his bedroom. In his bedroom he has a cuddle with both of us and we give him his dummy and a little noo noo (made from an old muslin) to take to bed. I’m not sure how it started but we’ve done this for months and it’s very cute to see. For a long time Edward has put the muslin under his chin and cuddled up with it in his cot and lately I’ve been thinking he’s ready for a pillow to lie on.
I picked up a lovely Cath Kidston pillowcase featuring aeroplanes but it needed resizing to a cot pillow size. I thought I’d make a simple tutorial on how to re-size a pillowcase in case anyone might find it helpful.
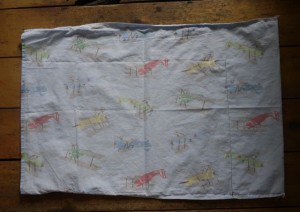
1. Turn pillow case inside out and measure the size you want to reduce it to and add a 1cm seam allowance (here a standard junior pillow size 57 x 35 cm). Pin and then tack the lines so it will be easy to sew on your machine.
2. Sew along the tacked lines and remove the tacking thread. Remember to backstitch at each end so the thread is secure. Cut away the excess material.
3. Turn the right way and stuff with your pillow! Voila, one re-sized pillow case and some scrap fabric for another project.
Edward hasn’t been too sure of his pillow yet. Every morning I go into his room and the pillow is at the other end of his cot to him! Hopefully he will get used to it soon…
Linking up with Handmade Thursday


8 Comments
Marianne
July 21, 2011 at 5:21 pmJenny, thanks for the re-sized pillow case tutorial. Great idea, and very cute. I’m sure your son will ‘warm’ up to it.
Enjoy the day,
Marianne
jane
July 21, 2011 at 7:23 pmGreat little tutorial and love the pillow case with all the little planes on it 🙂
Rebecca
July 21, 2011 at 9:24 pmHaha – mine sleep the other end from their pillow too. They like to be snuggled into bed lying on them though. Great idea to resize the pillow case, I would have just left all the spare material hanging.
mummy@bodfortea
July 21, 2011 at 9:44 pmYou make it sound easy! Fab tutorial, thanks 😀
Liska
July 21, 2011 at 10:50 pmDoes he need a pillow? I am clueless about it … x
Amanda @gidders1
July 22, 2011 at 1:22 pmThis is something I’m thinking about. Miss A is in a cotbed, and sleeps in a sleeping bag. Its not going to be long before we need to get rid of the sides, and stop using the sleeping bag.
Thanks for this!
mummiafelice
July 28, 2011 at 8:46 amWhat a great idea! Thanks for a great tutorial. I might have a go at this one! Sorry for the late comment, and thank you for linking up!
How to make a duvet cover | the-gingerbread-house.co.uk
August 27, 2011 at 10:52 pm[…] couple of weeks ago Edward got his first pillow (which he is slowly getting used to!) and as the weather has been so cool we also thought it was […]